Creating Orders
Learn how to create orders on Burq.
Introduction
Let’s talk about how to get your orders set up. Whether you’re creating one order or a hundred, we’ve got you covered.
This video gives an overview of how to create orders on Burq:
Creating a Single Order
Here’s how to create an order one step at a time:
- Go to the Orders Section:
Log in to your Burq Dashboard and head over to the "Orders" tab. - Click ‘Create Order’:
Hit the button to open up the order form. - Fill Out the Details:
-
Select a delivery time
You can choose to request a driver right away (ASAP) or you can choose to schedule delivery, with the option to select date and time for either pickup or drop off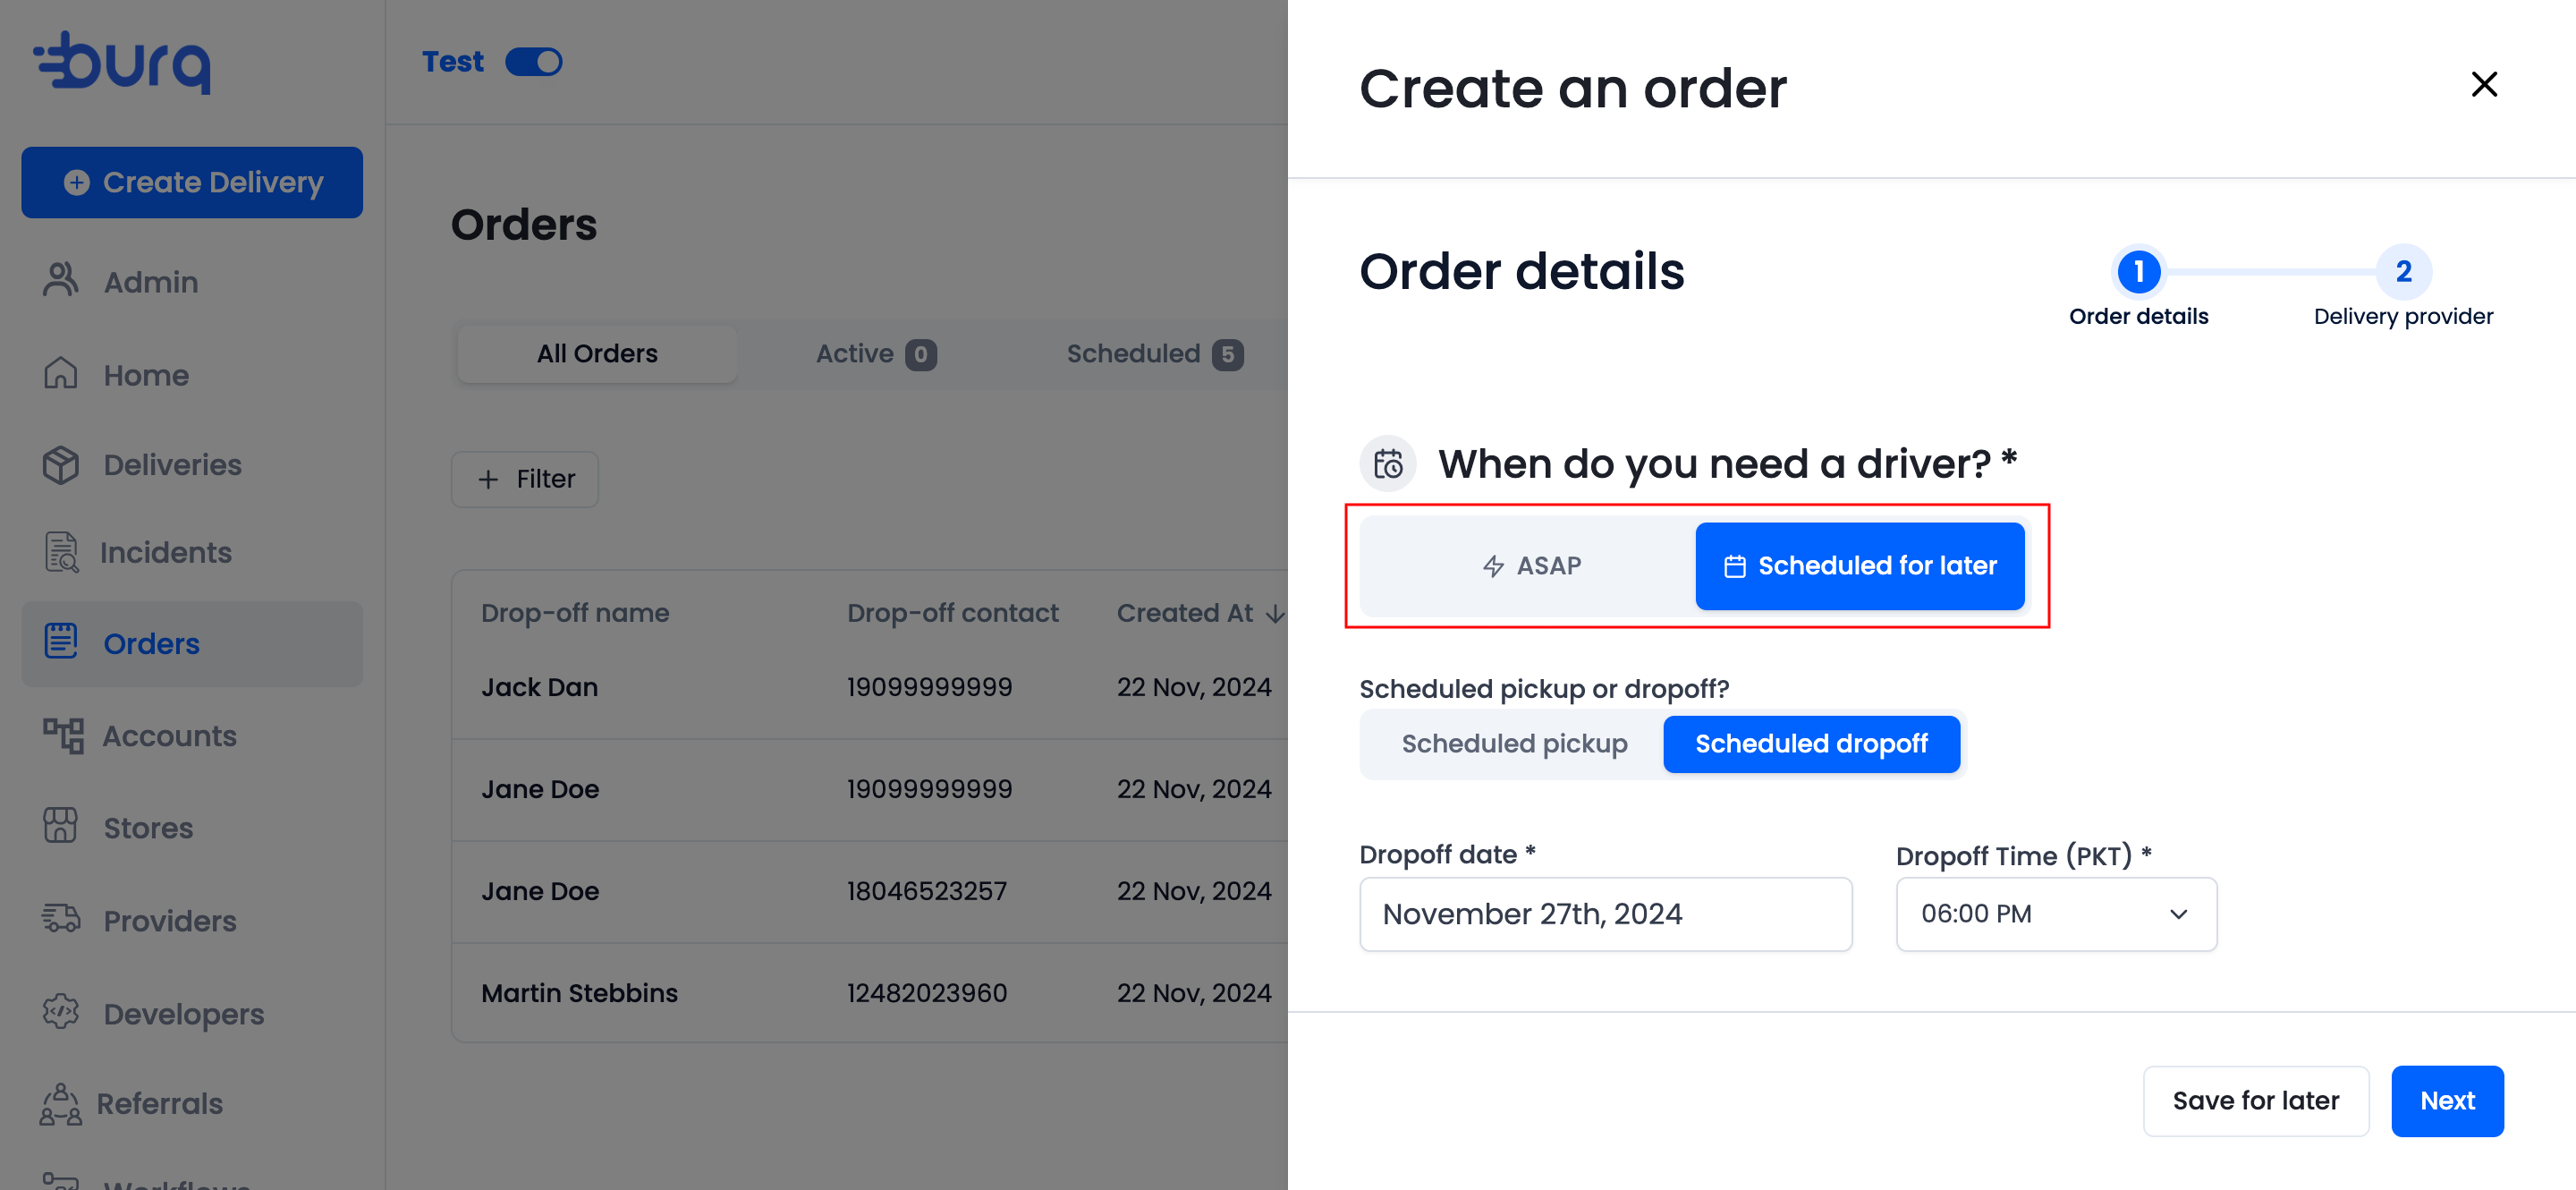
-
Pickup Address
Enter a new address or choose to browse through saved addresses for Stores or Customers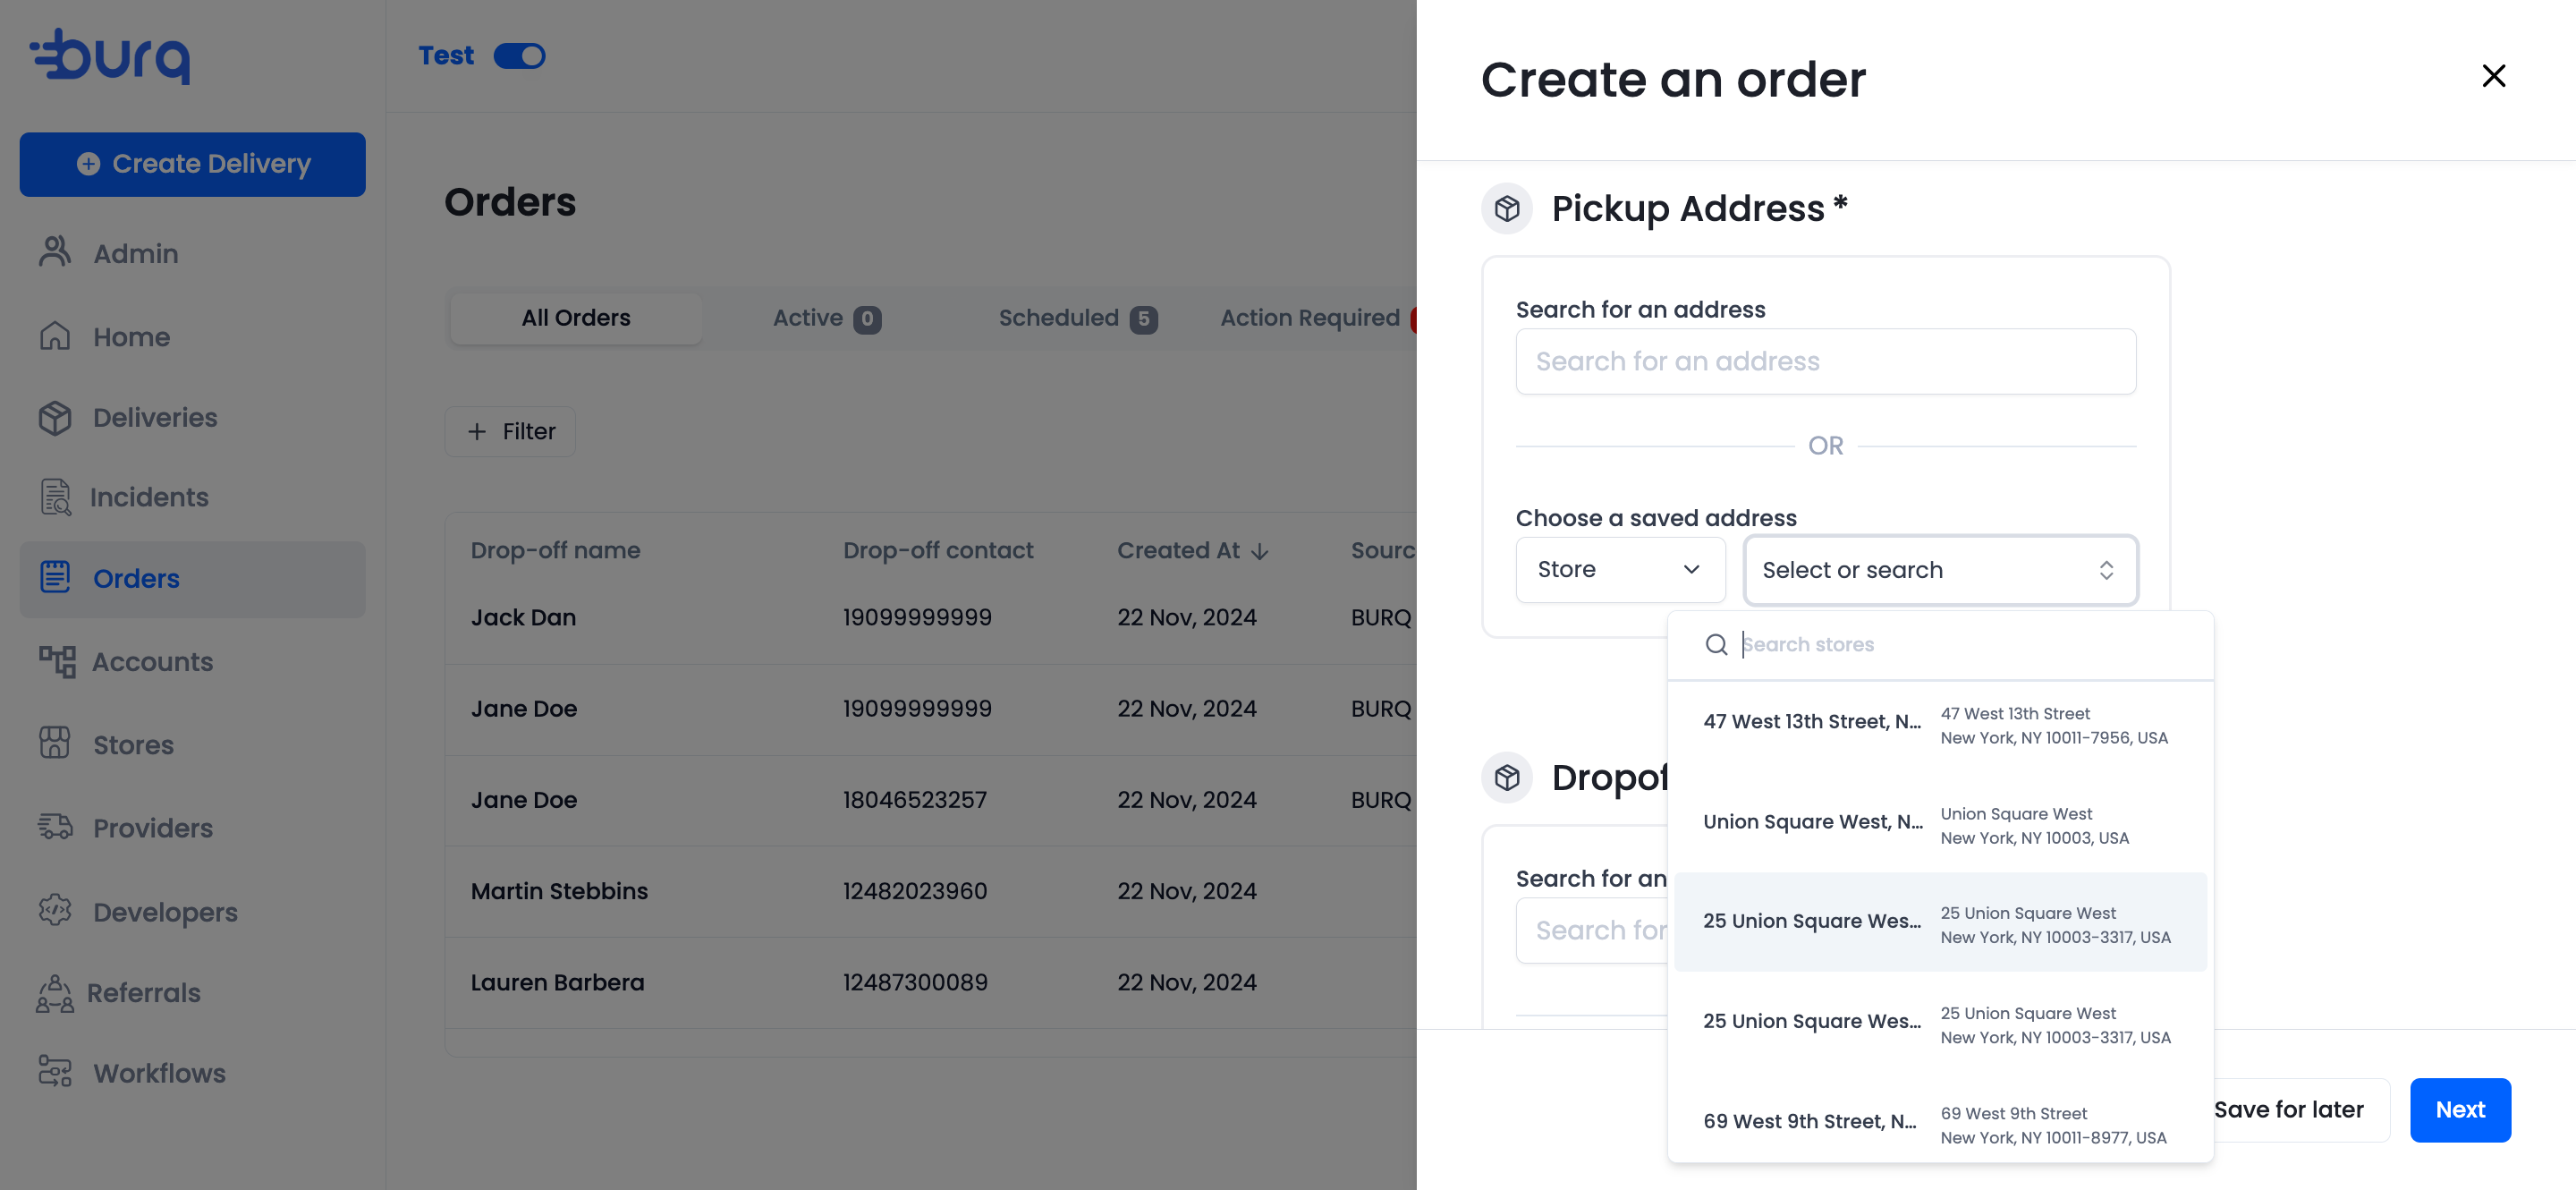
-
Details
Provide all additional information to help the DSP make the delivery effectively. When you select a pre-saved address as the pickup address, we will pre-fill all the additional information that you had previously entered for the same address, saving you some time and effort.
-
Dropoff Address
Enter a new address or choose to browse through saved addresses for Customers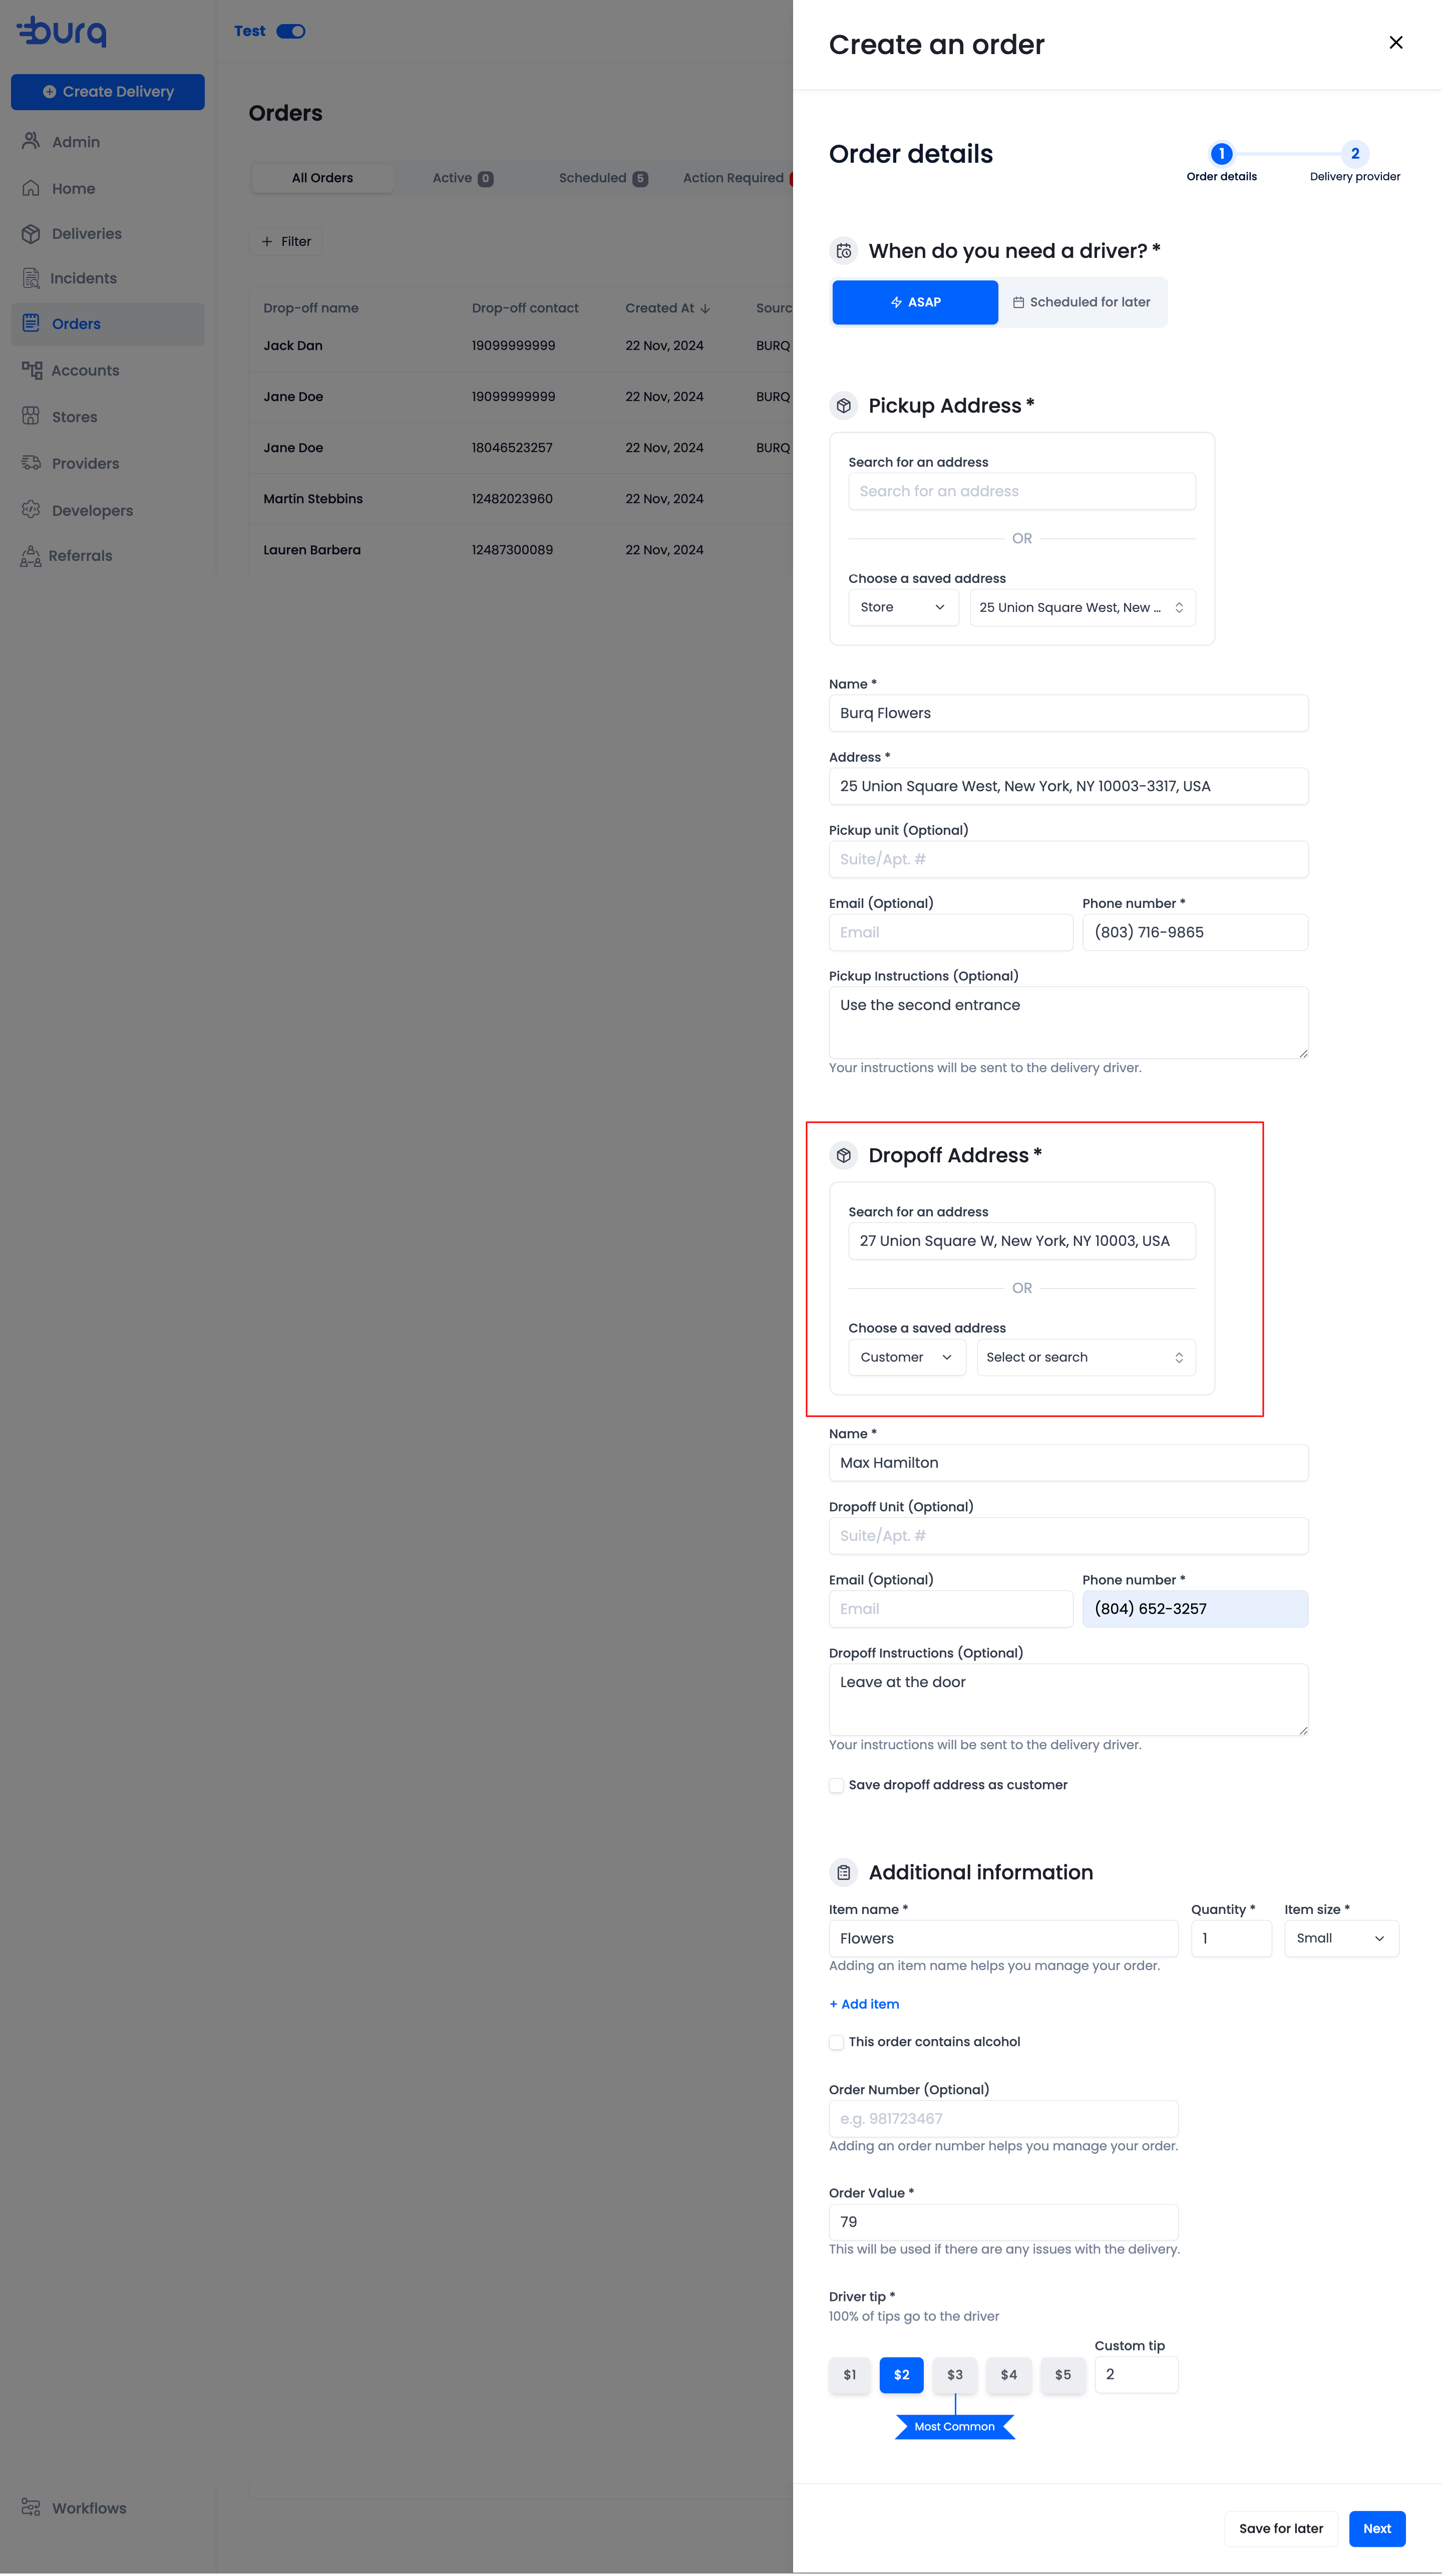
-
Customer Details
Similar to details for pickup address, provide all additional information. When you select a pre-saved address as the dropoff address, again all saved information will be pre-filled for you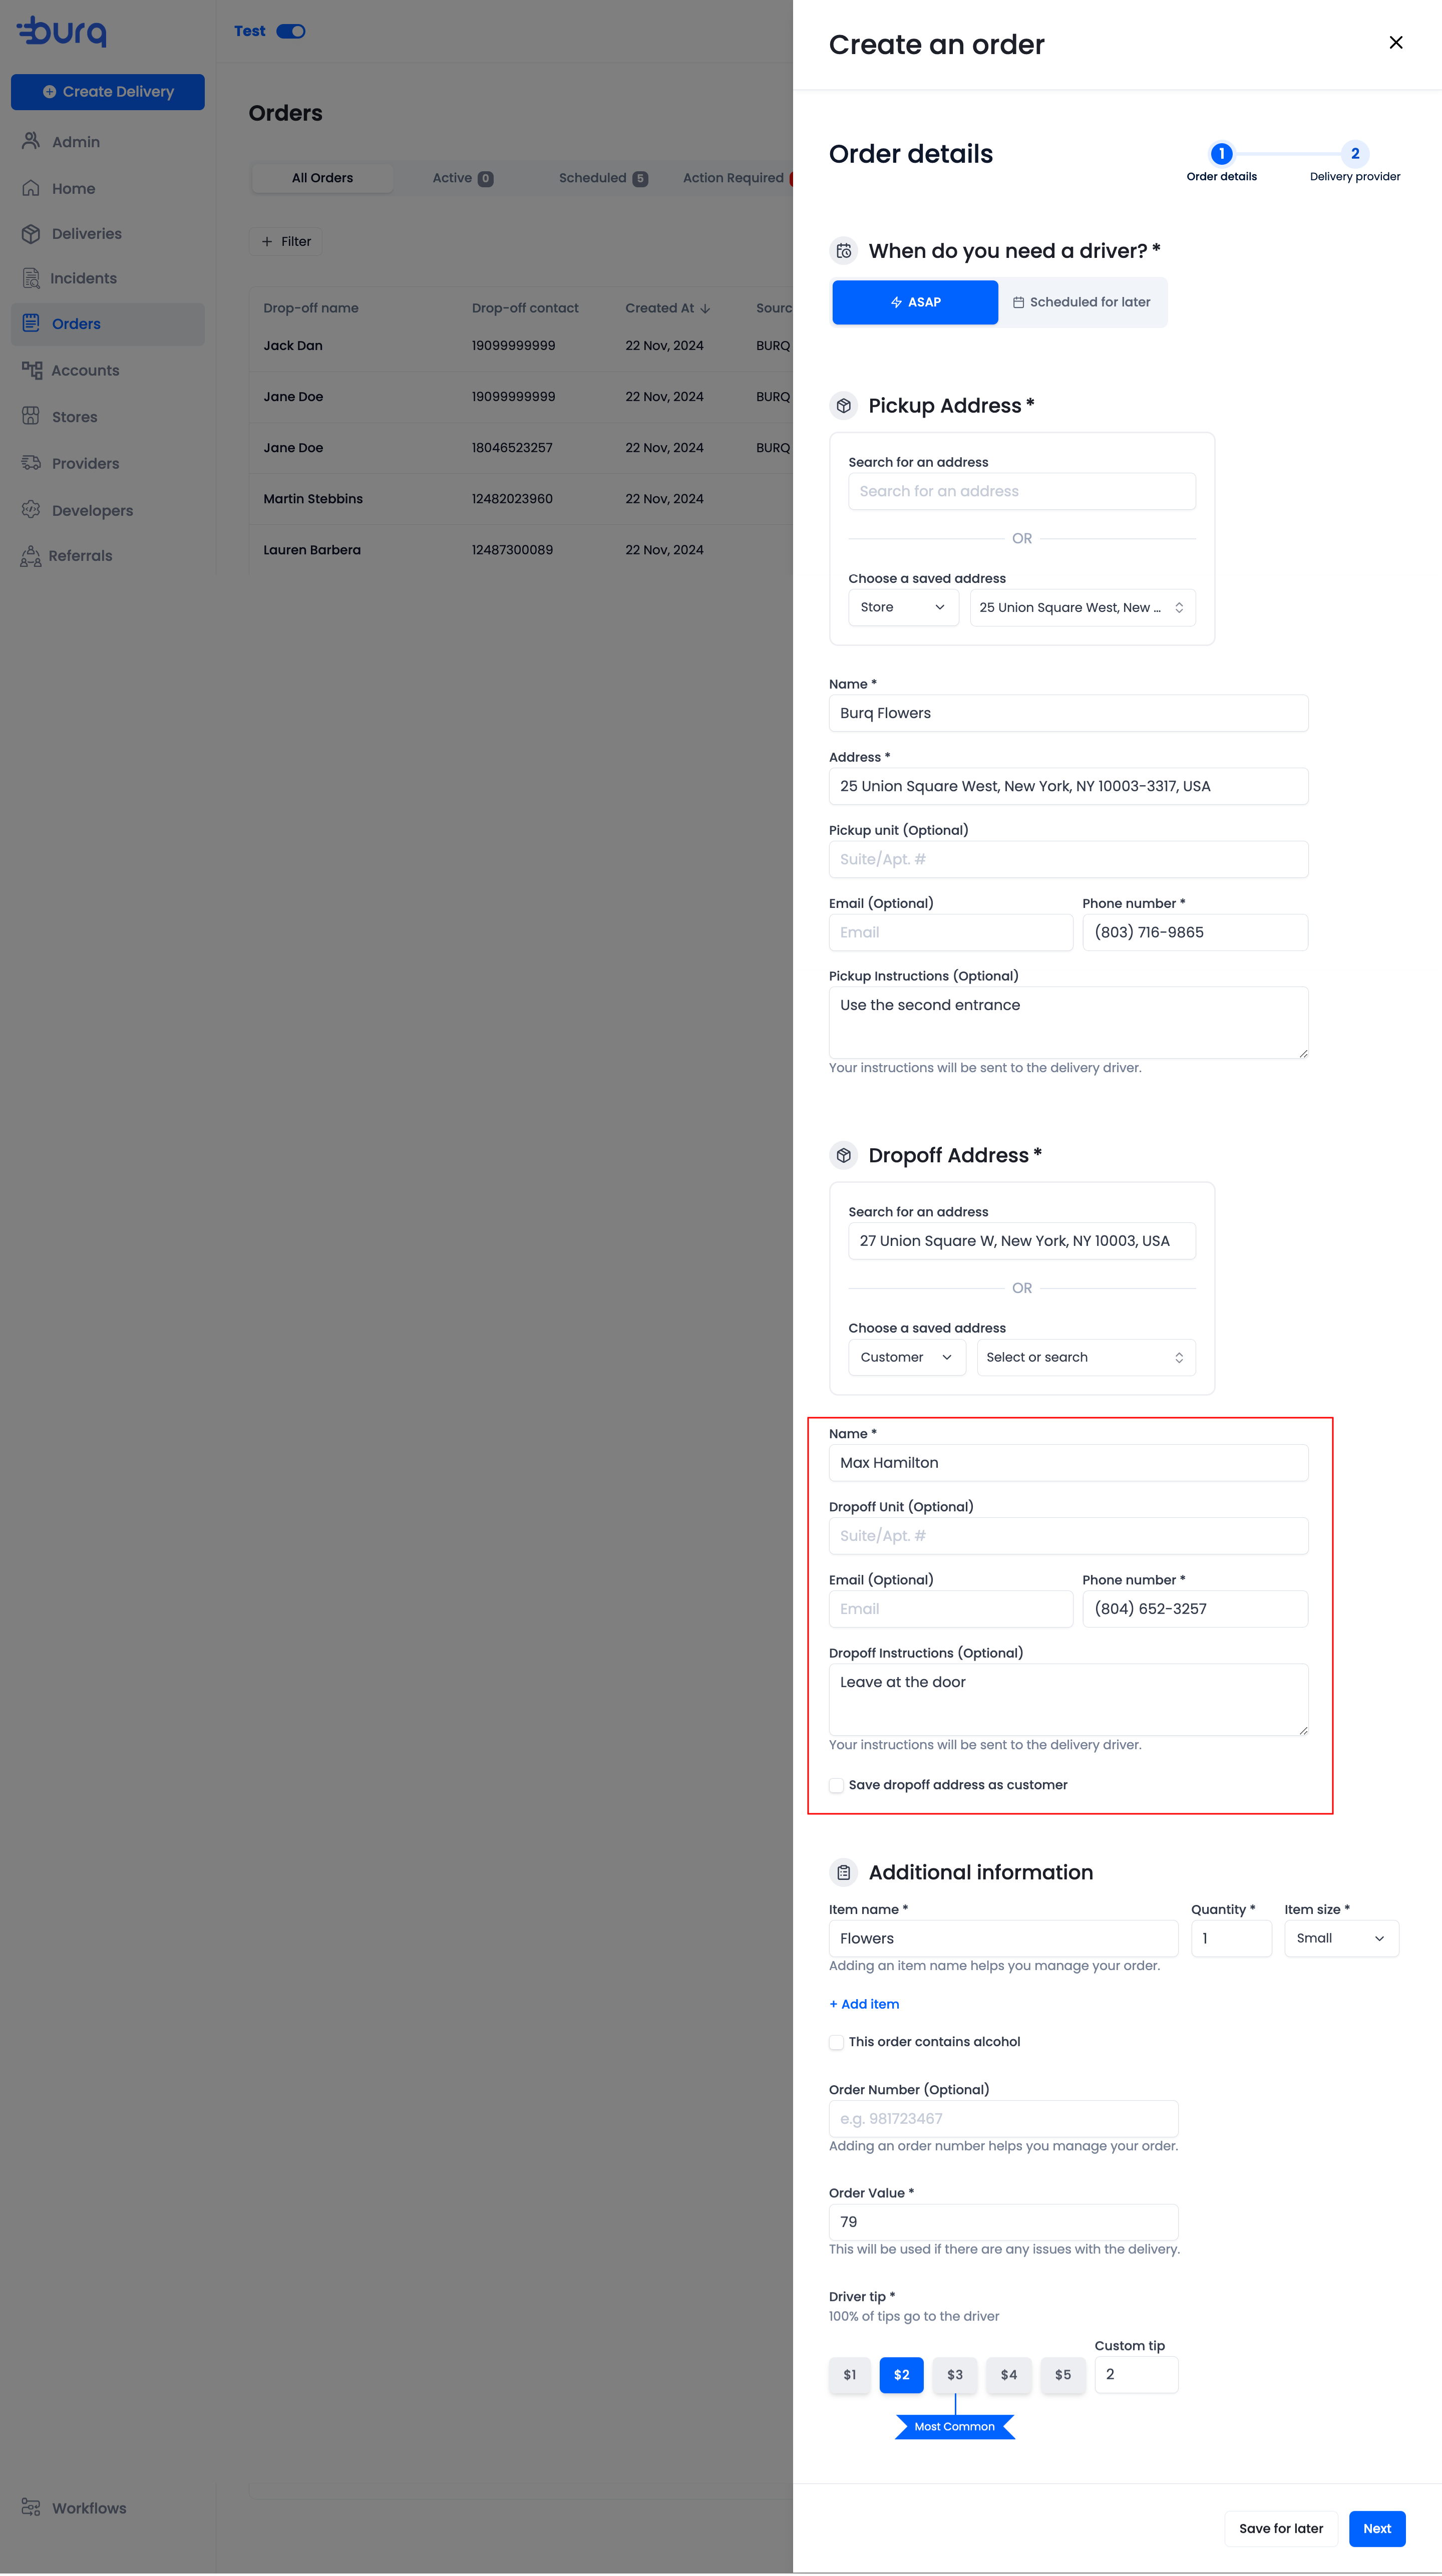
-
Enter order details
Provide all the relevant information such as the items included in the order, their quantity and size so the DSPs can make a better judgement when sending a vehicle for delivery. Adding order value helps us in cases of refunds and you can choose to add an order number for your internal tracking and management.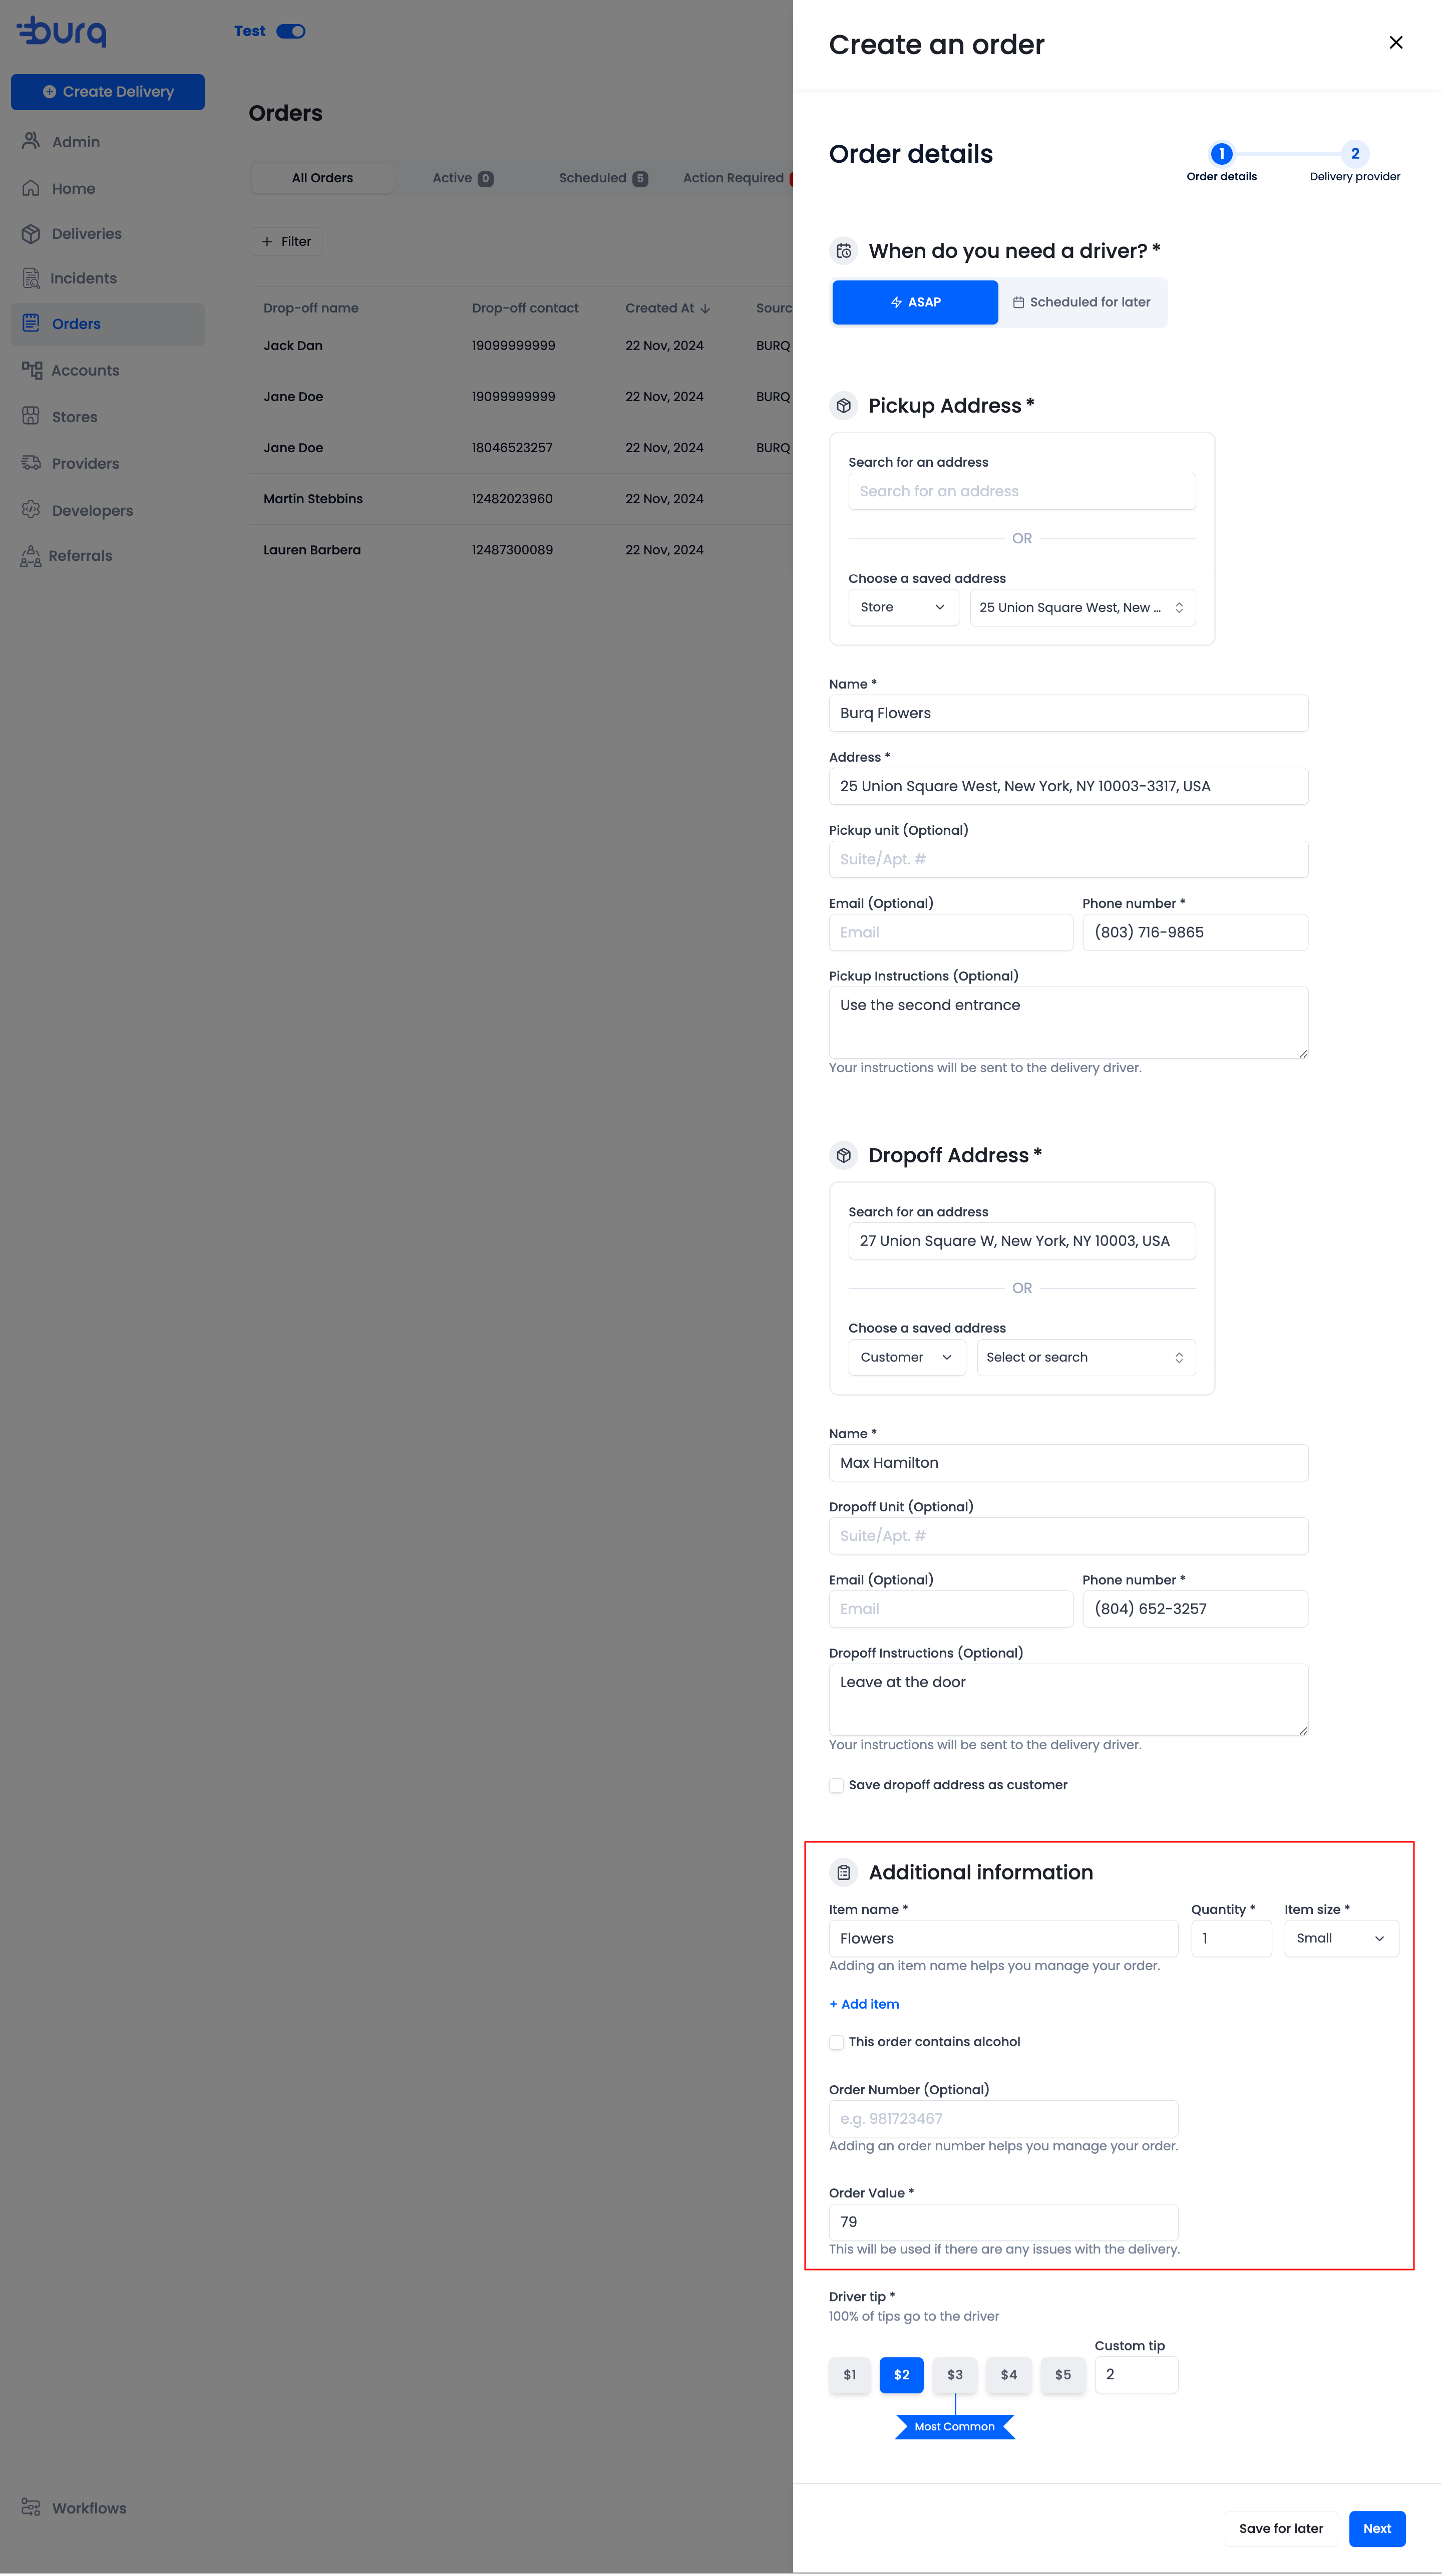
-
Set tips
Tips are a way of ensuring top quality service from the riders as 100% of the tips go to them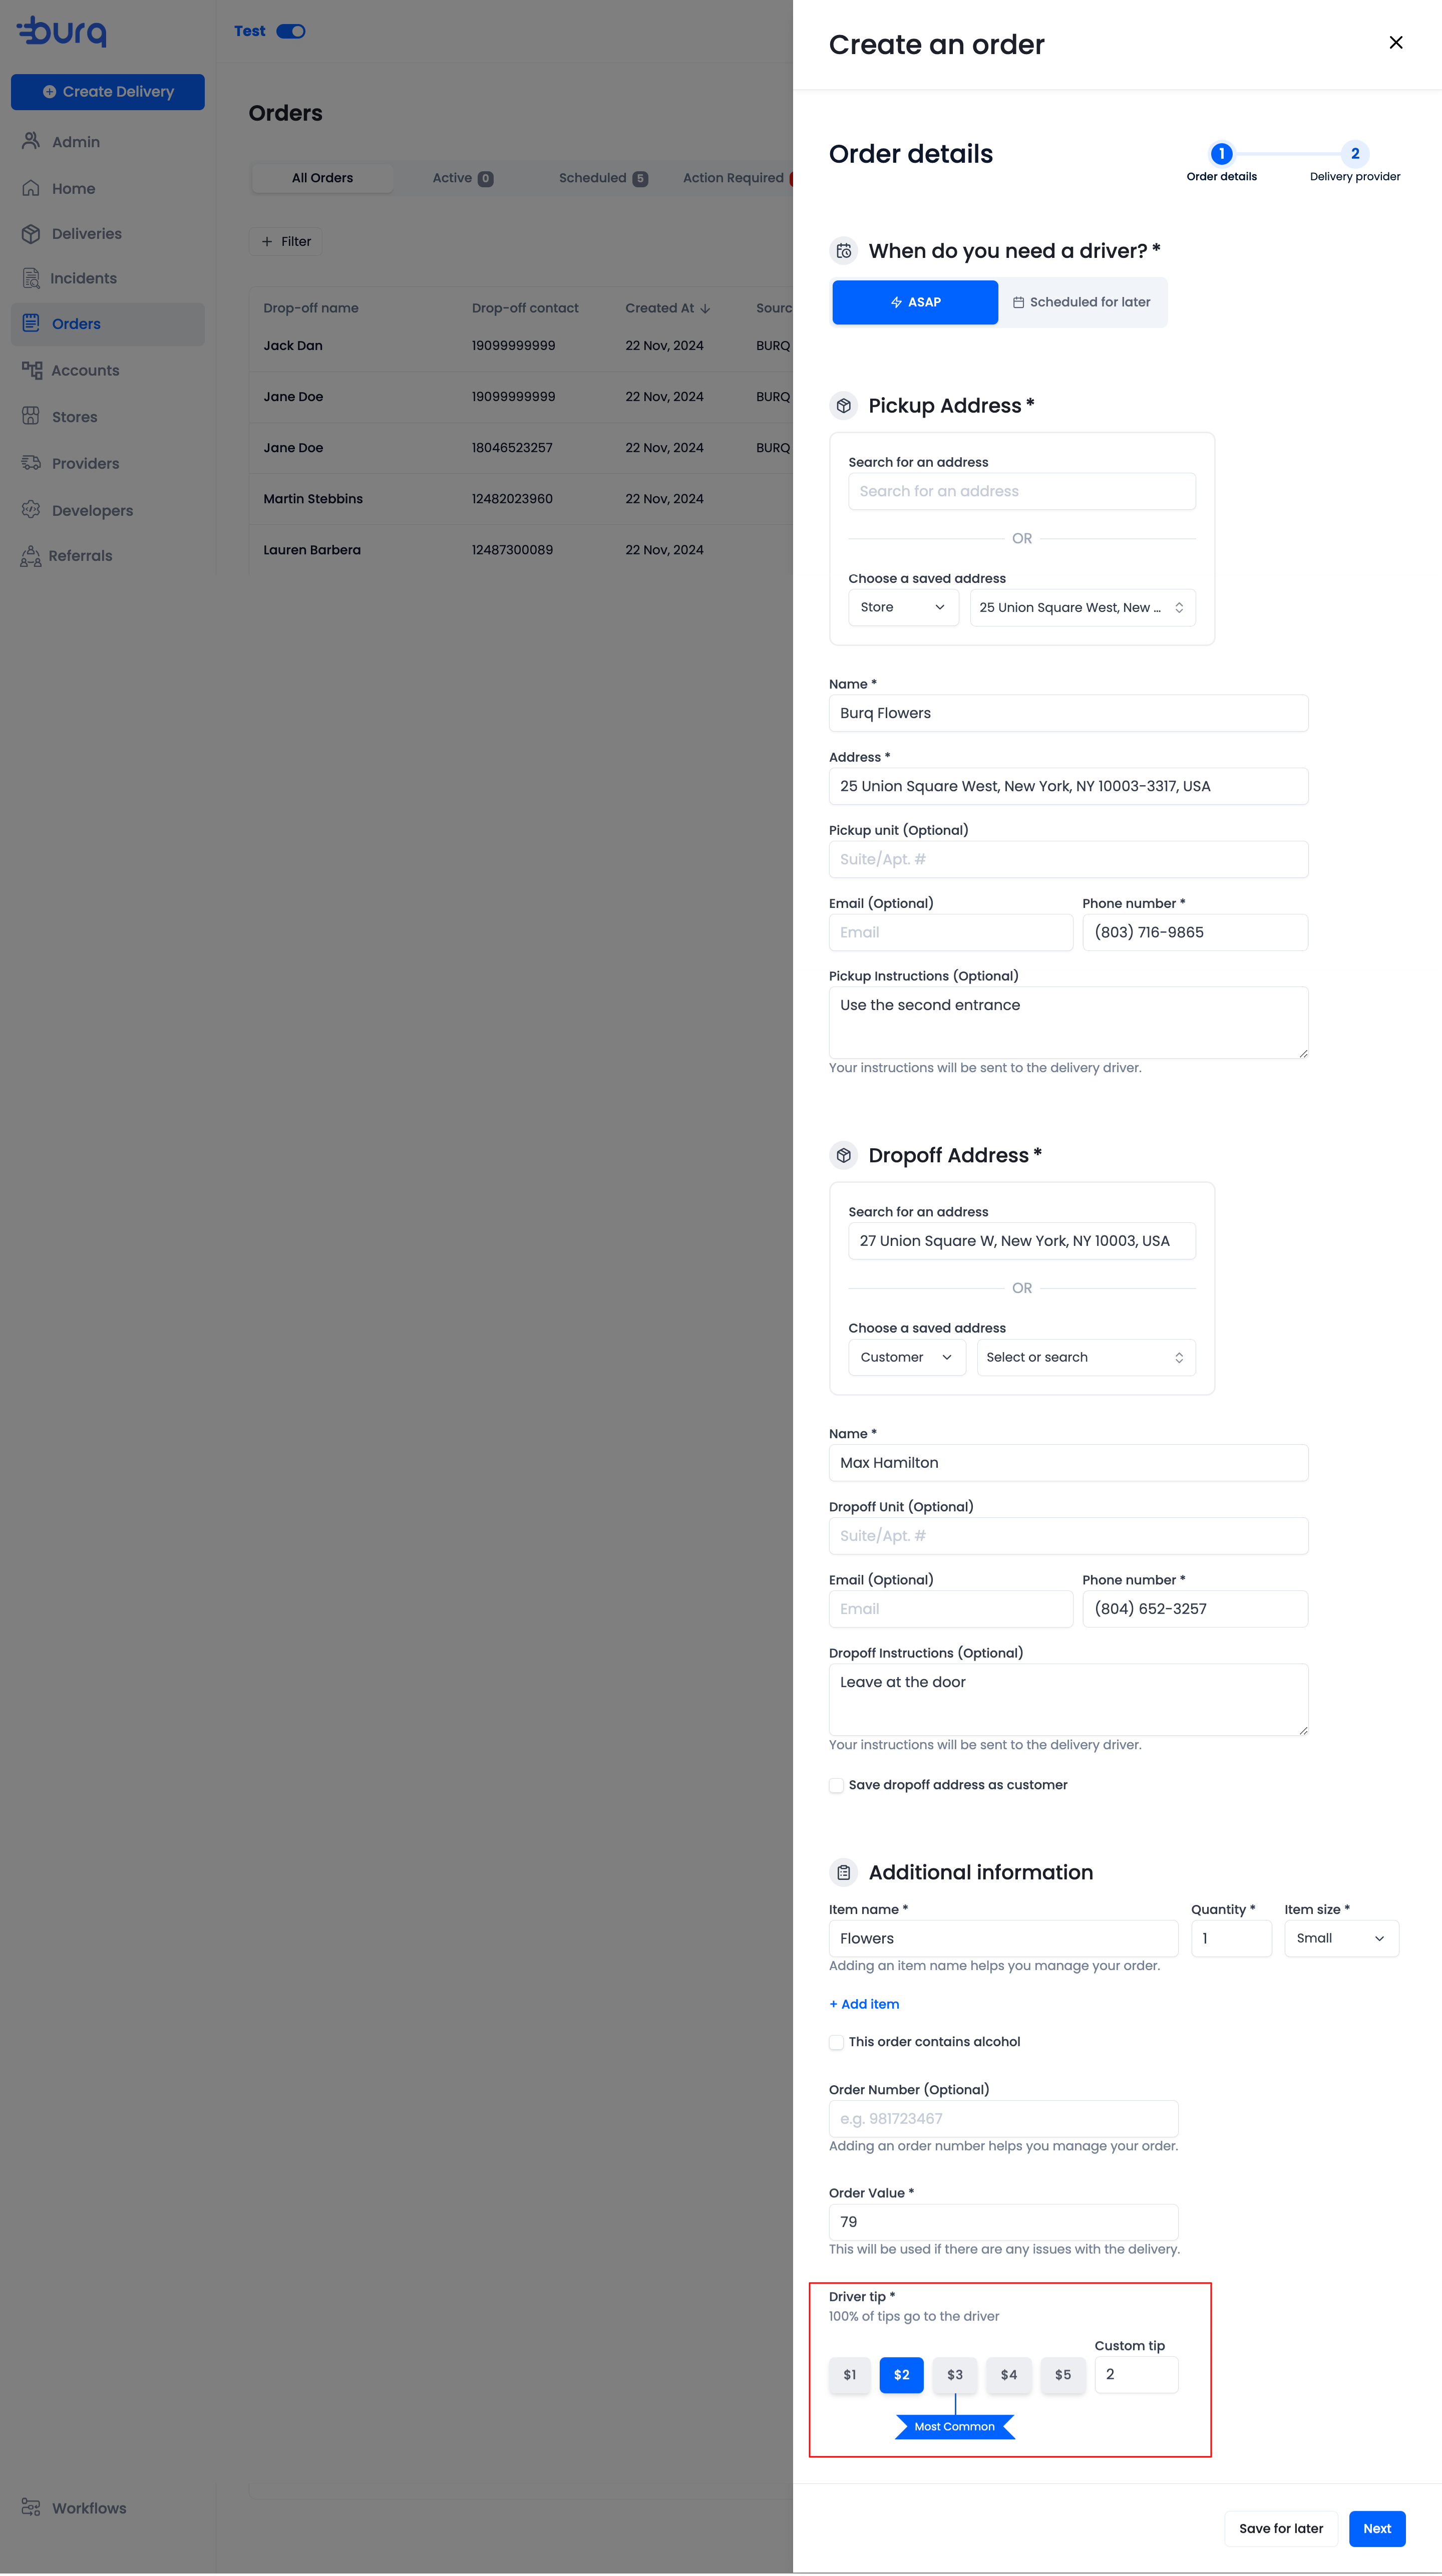
-
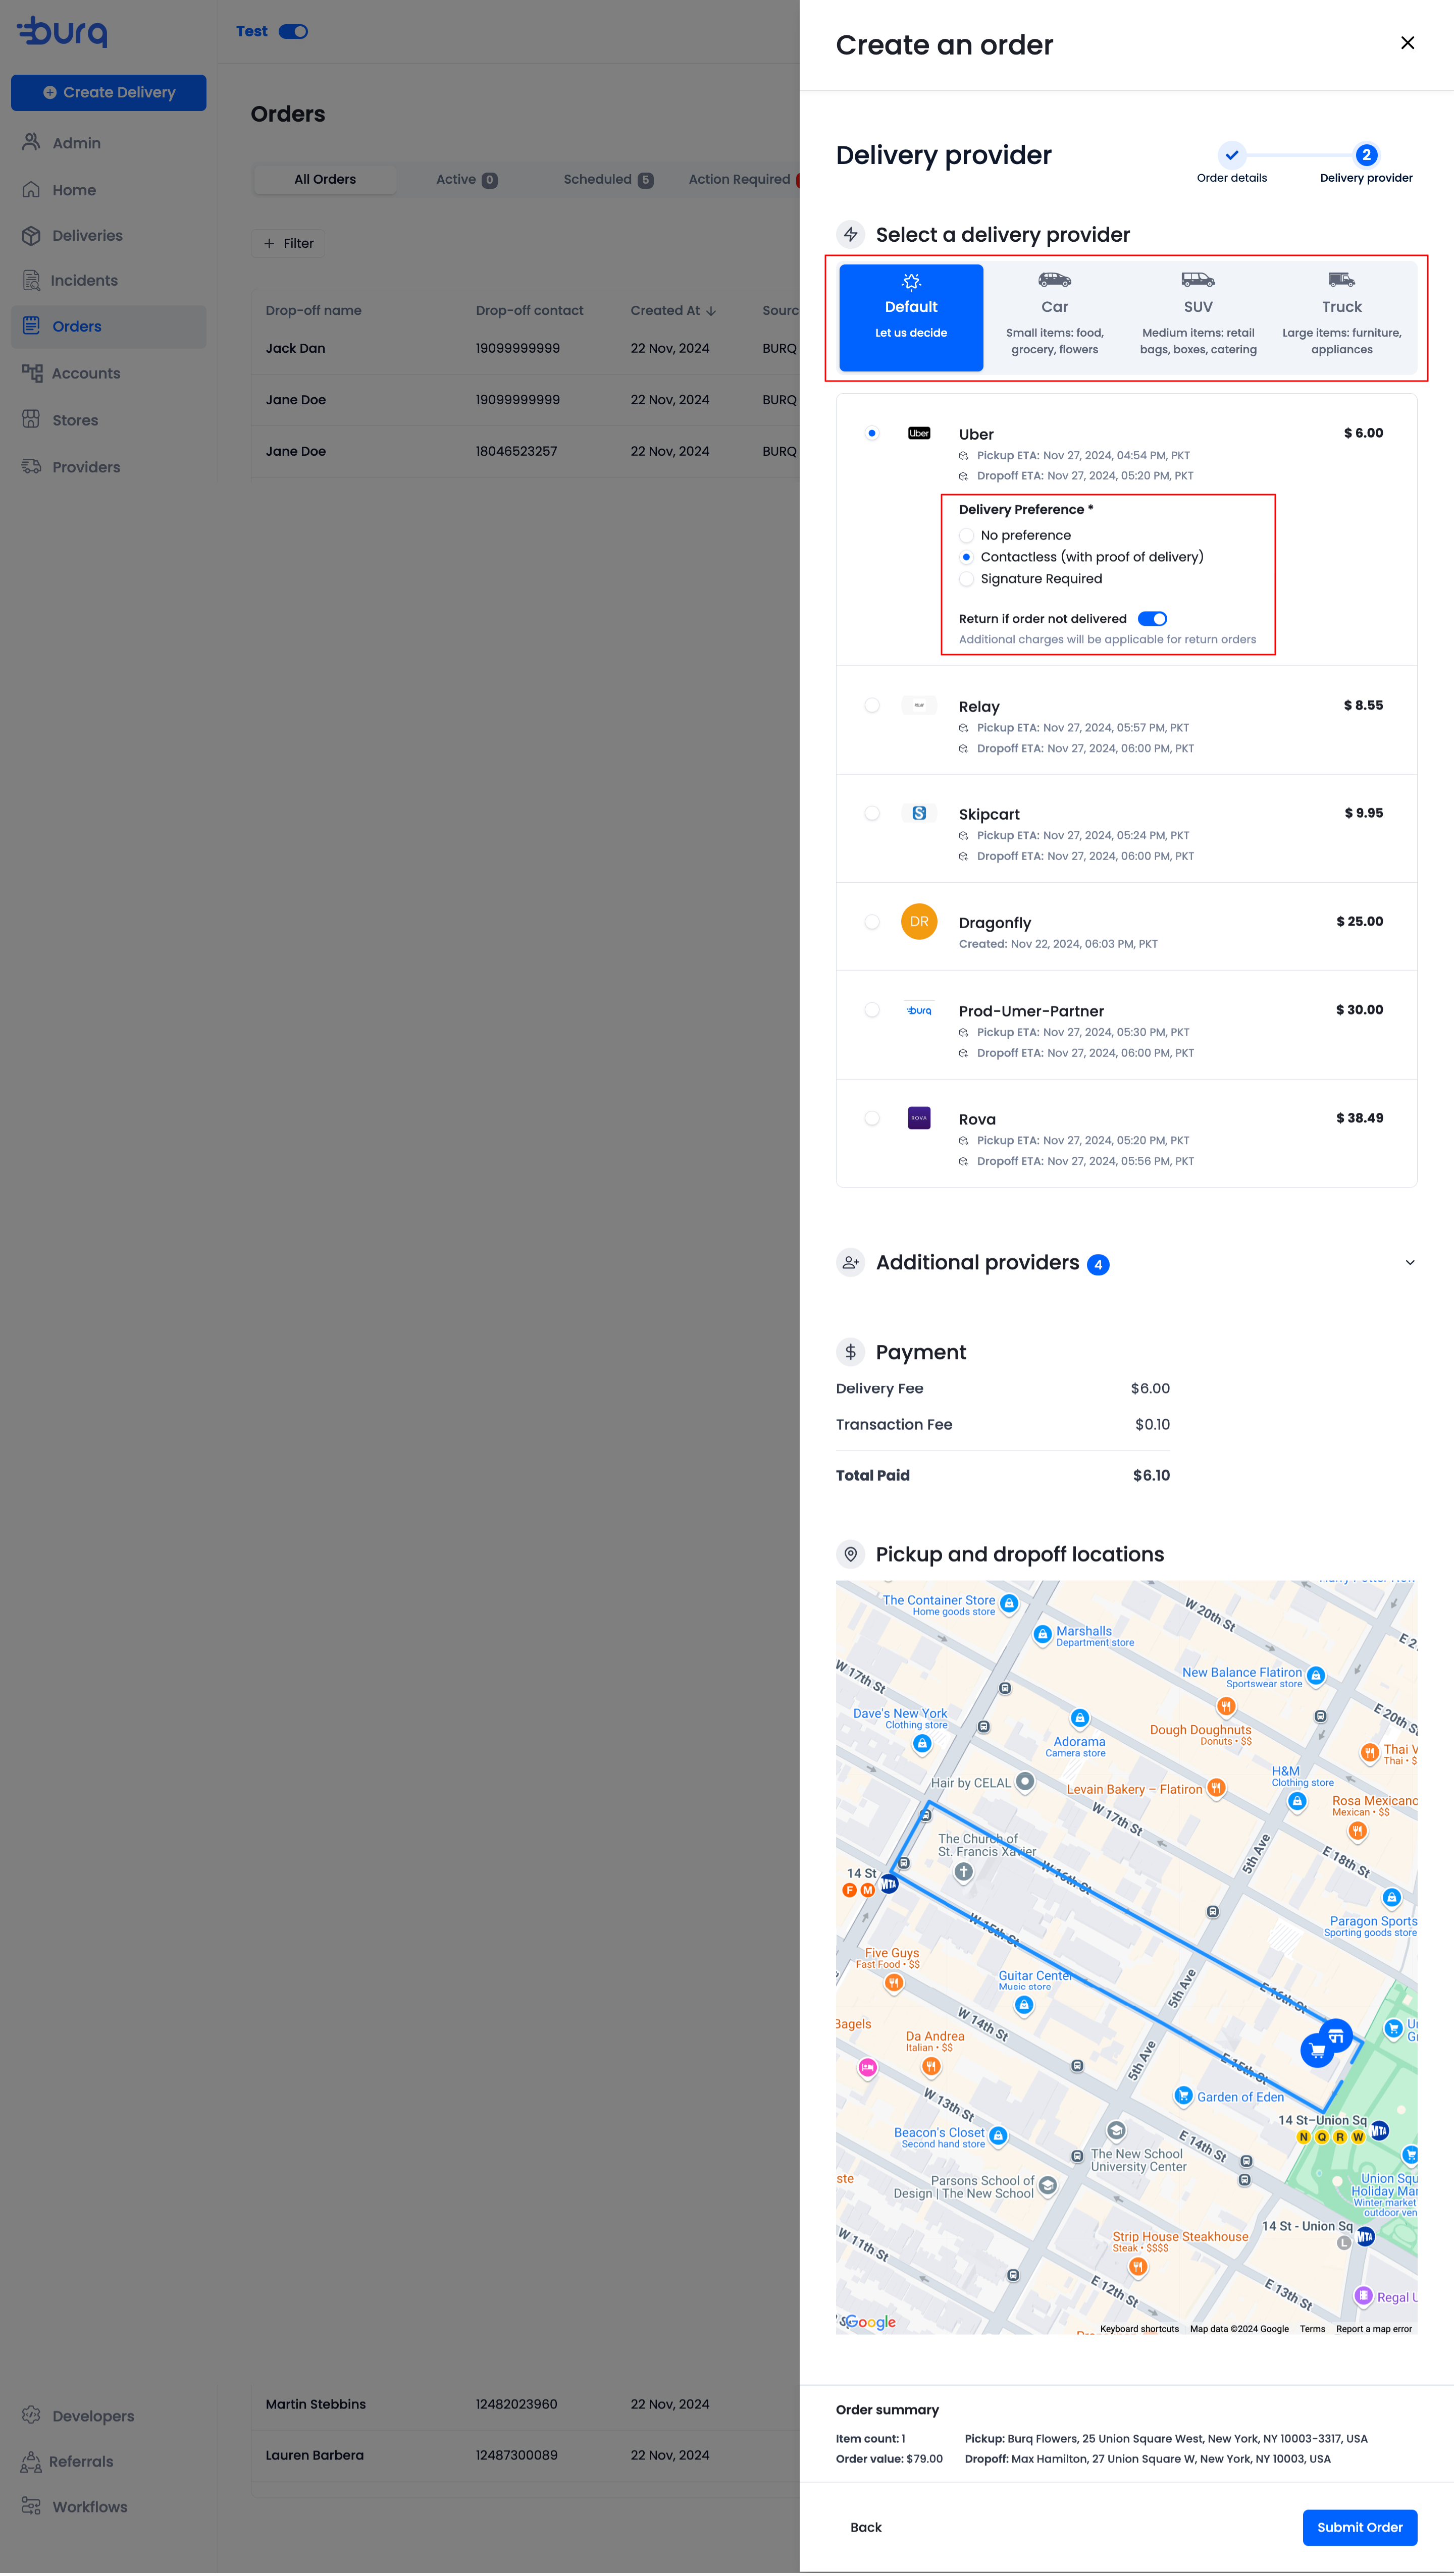
Click on Next to assign Provider
Select the preferred vehicle type and the delivery preferences. Click submit to assign Provider and initiate delivery
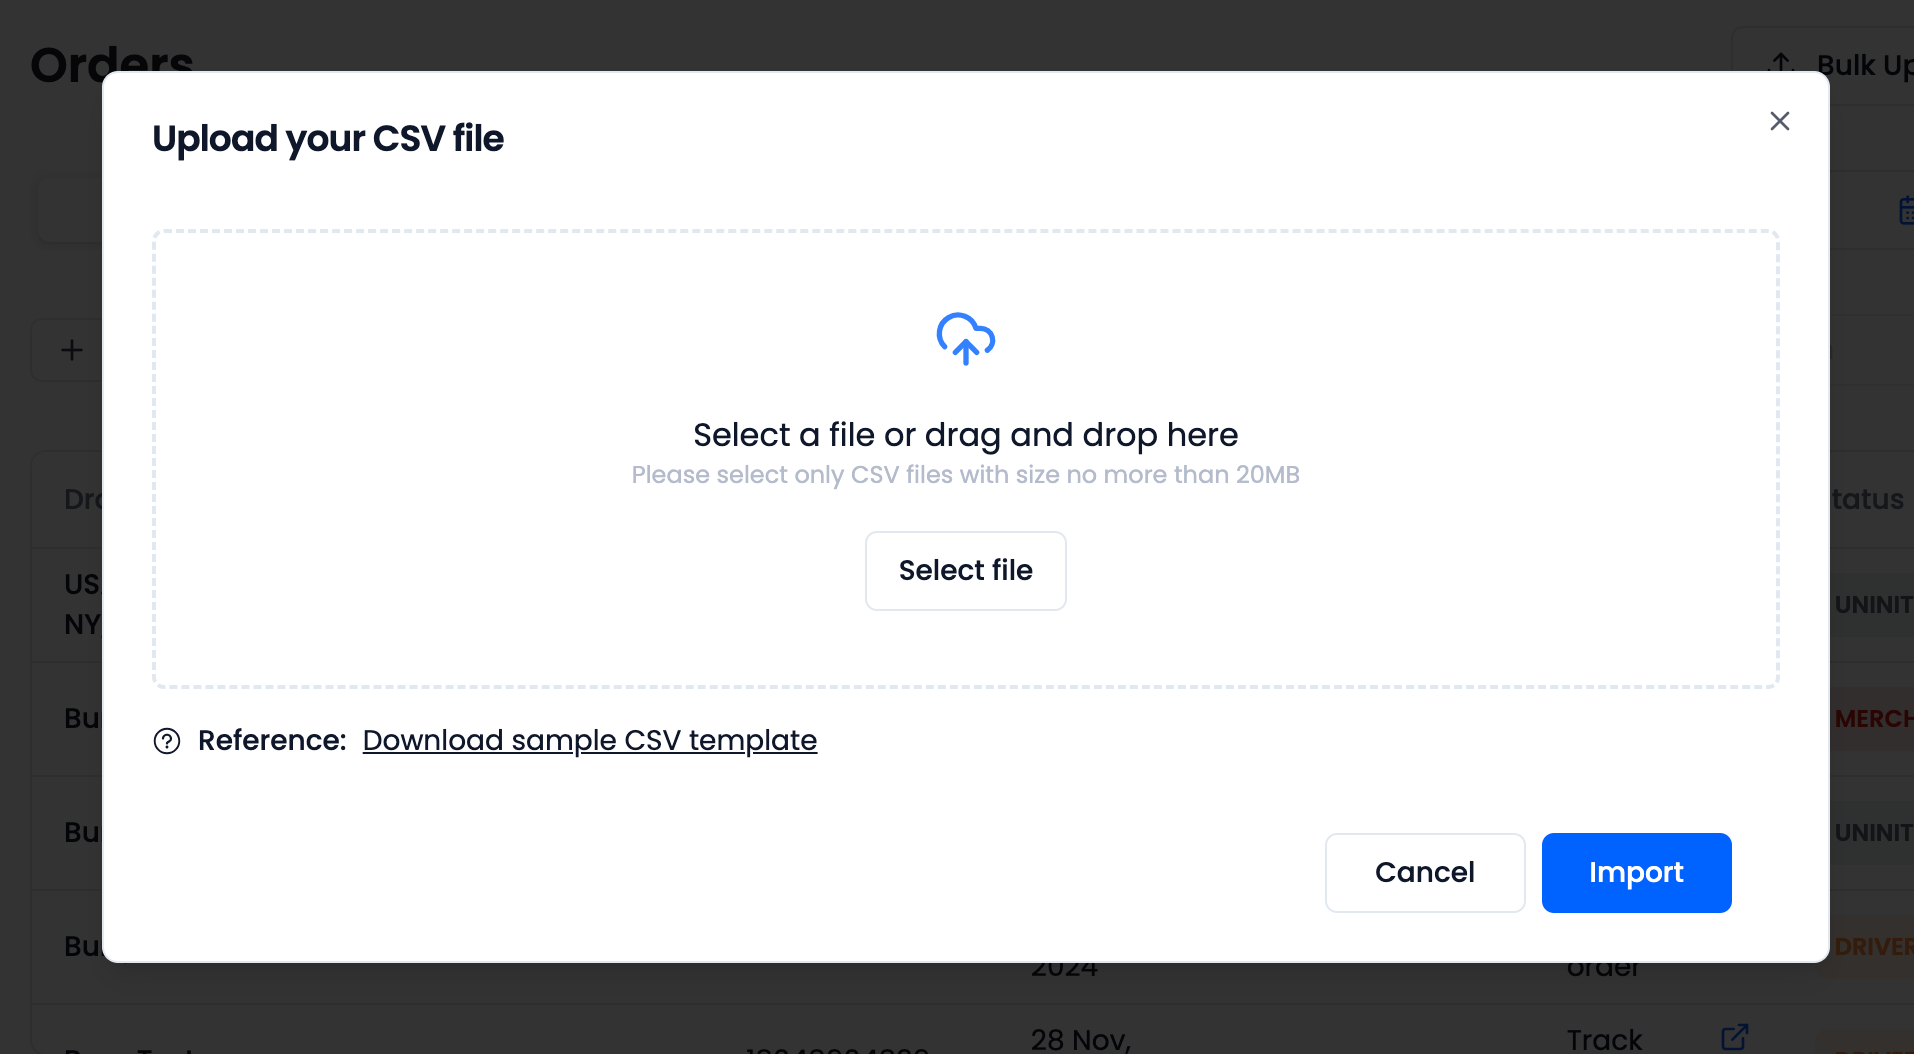
Creating Orders in Bulk
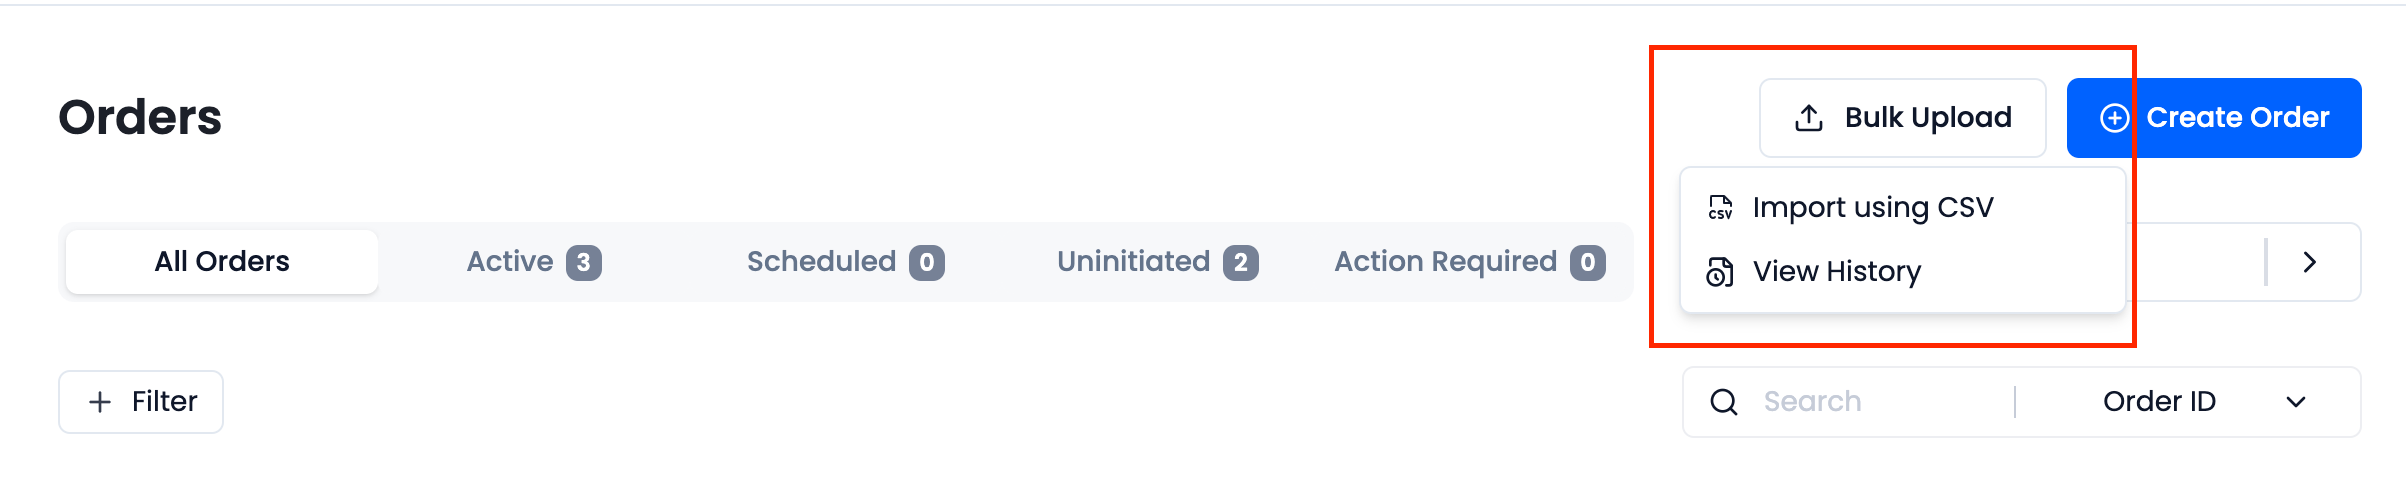
Burq lets you import multiple orders on to the dashboard using CSV. To import, simply click on the Import using CSV button that is available in the Bulk Upload button in the Orders tab as shown below.
You can drag and drop your CSV file or click browse the file and click Import. You can download the sample CSV that we have created. It contains the format that is needed to upload the file.
How to use CSV file
CSV file has the following columns. Some columns are required for orders to be created. You can experiment with CSV upload by creating orders in test mode.
| Field | Required? | Description/Notes |
|---|---|---|
| External Order Reference | Yes | Merchant-provided delivery identifier. Used for cross-referencing deliveries from Burq API with merchant systems. |
| Store ID | ID of a store created on Burq. Found under the Stores tab in Burq dashboard. | |
| Pickup Name | Yes | Name of individual or company at pickup location. Optional if store_id is provided. Otherwise required. |
| Pickup Phone Number | Yes | Phone number of pickup location. Optional if store_id is provided. Otherwise required. Example: 18045893983 |
| Pickup Address | Yes | Full address of pickup location (street, city, zipcode, country). Exclude unit number. Optional if store_id is provided. Example: 123 W Main St, Richmond, VA 23223, USA |
| Pickup At | Timestamp for pickup in ISO8601 format (UTC). Cannot be provided with dropoff_at. Example: 2024-06-14T09:22+07:00 | |
| Pickup Unit Number | Unit number of pickup location. Optional if store_id is provided. | |
| Pickup Notes | Instructions for drivers when picking up items. | |
| Dropoff Name | Yes | Name of individual or company receiving the delivery. |
| Dropoff Phone Number | Yes | Phone number of dropoff contact. Example: 18045893983 |
| Dropoff Address | Yes | Full address of dropoff location (street, city, zipcode, country). Exclude unit number, which is a separate field. Example: 13th St, Brooklyn, NY 11215, USA |
| Dropoff At | Timestamp for delivery in ISO8601 format (UTC). Cannot be provided with pickup_at. Example: 2024-06-14T09:22+07:00 | |
| Dropoff Unit Number | Unit number of dropoff location. | |
| Dropoff Notes | Instructions for drivers when dropping off items. | |
| Vehicle | Preferred vehicle type (Car, SUV, Truck). May not affect all providers. | |
| Order Value | Total value of all items in the delivery in cents. | |
| Tip Amount | Tips for the driver. Forwarded to delivery providers in cents. | |
| Item Name | Yes | List of items to be delivered. |
| Item Quantity | Yes | Quantity of items listed. |
| Item Size | Yes | Size of the item (Small, Medium, Large). |
| Contactless Delivery | Indicates if delivery is contactless. Cannot be true if signature is required. | |
| Request Signature | Indicates if signature is required at dropoff. Cannot be true if contactless delivery is enabled. | |
| Test Mode | Indicates if delivery is created in test mode. | |
| Auto Initiate | Automatically assigns providers based on Order Workflow preferences. Configurable on the Order Workflows page. |
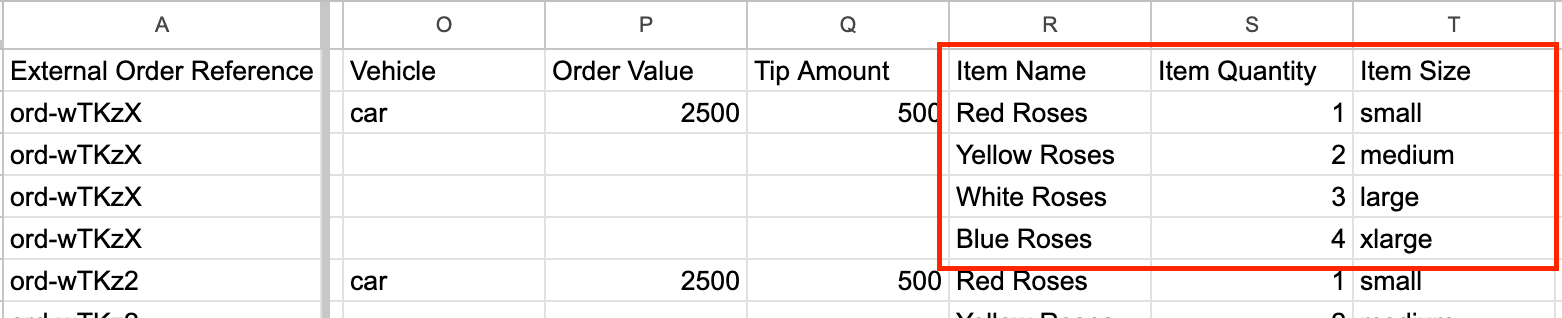
Adding multiple items
To list down multiple items in a single order, simply add External order ID number in the following row and just add item details as shown in the image below.
View bulk upload history
By clicking on the View history button, merchants can view the the status of their uploaded file and check how many orders have been created and how many have failed.
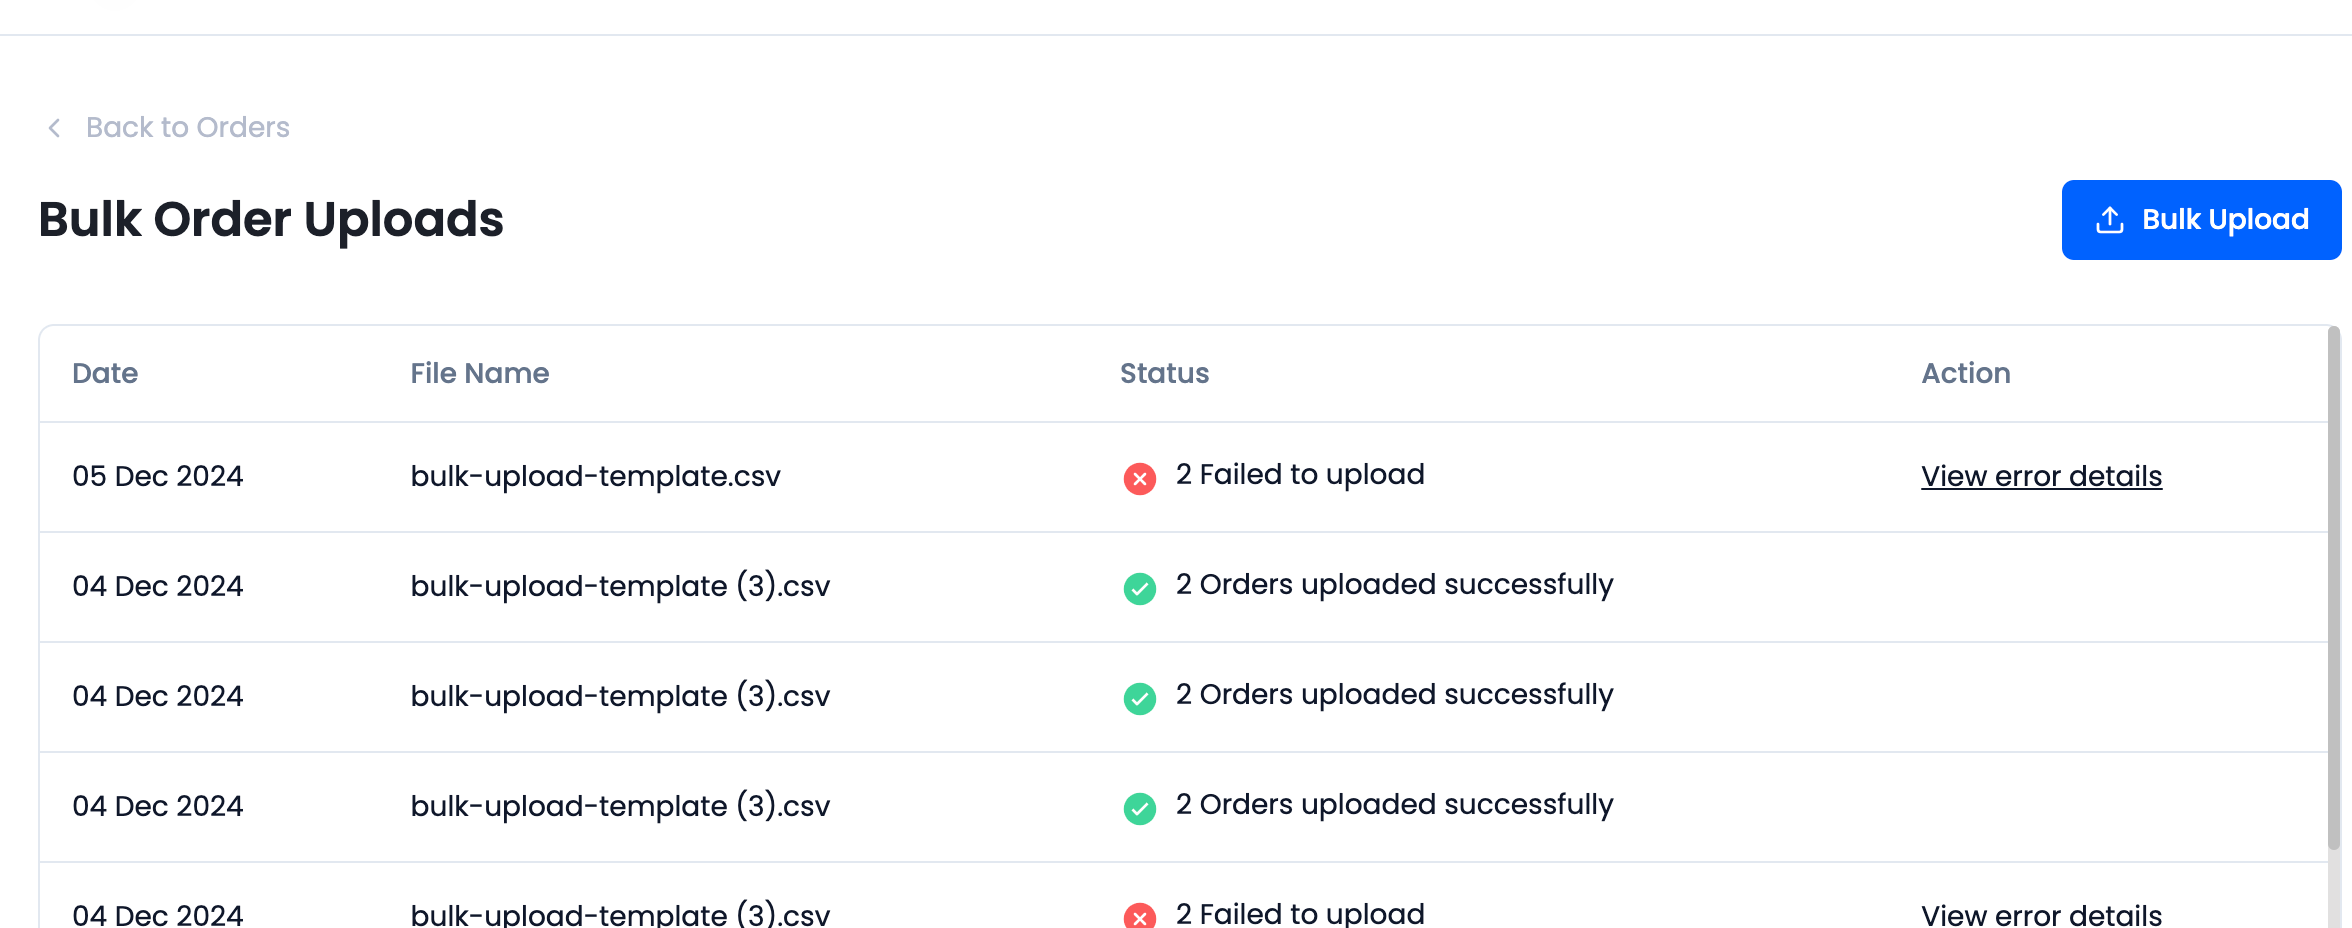
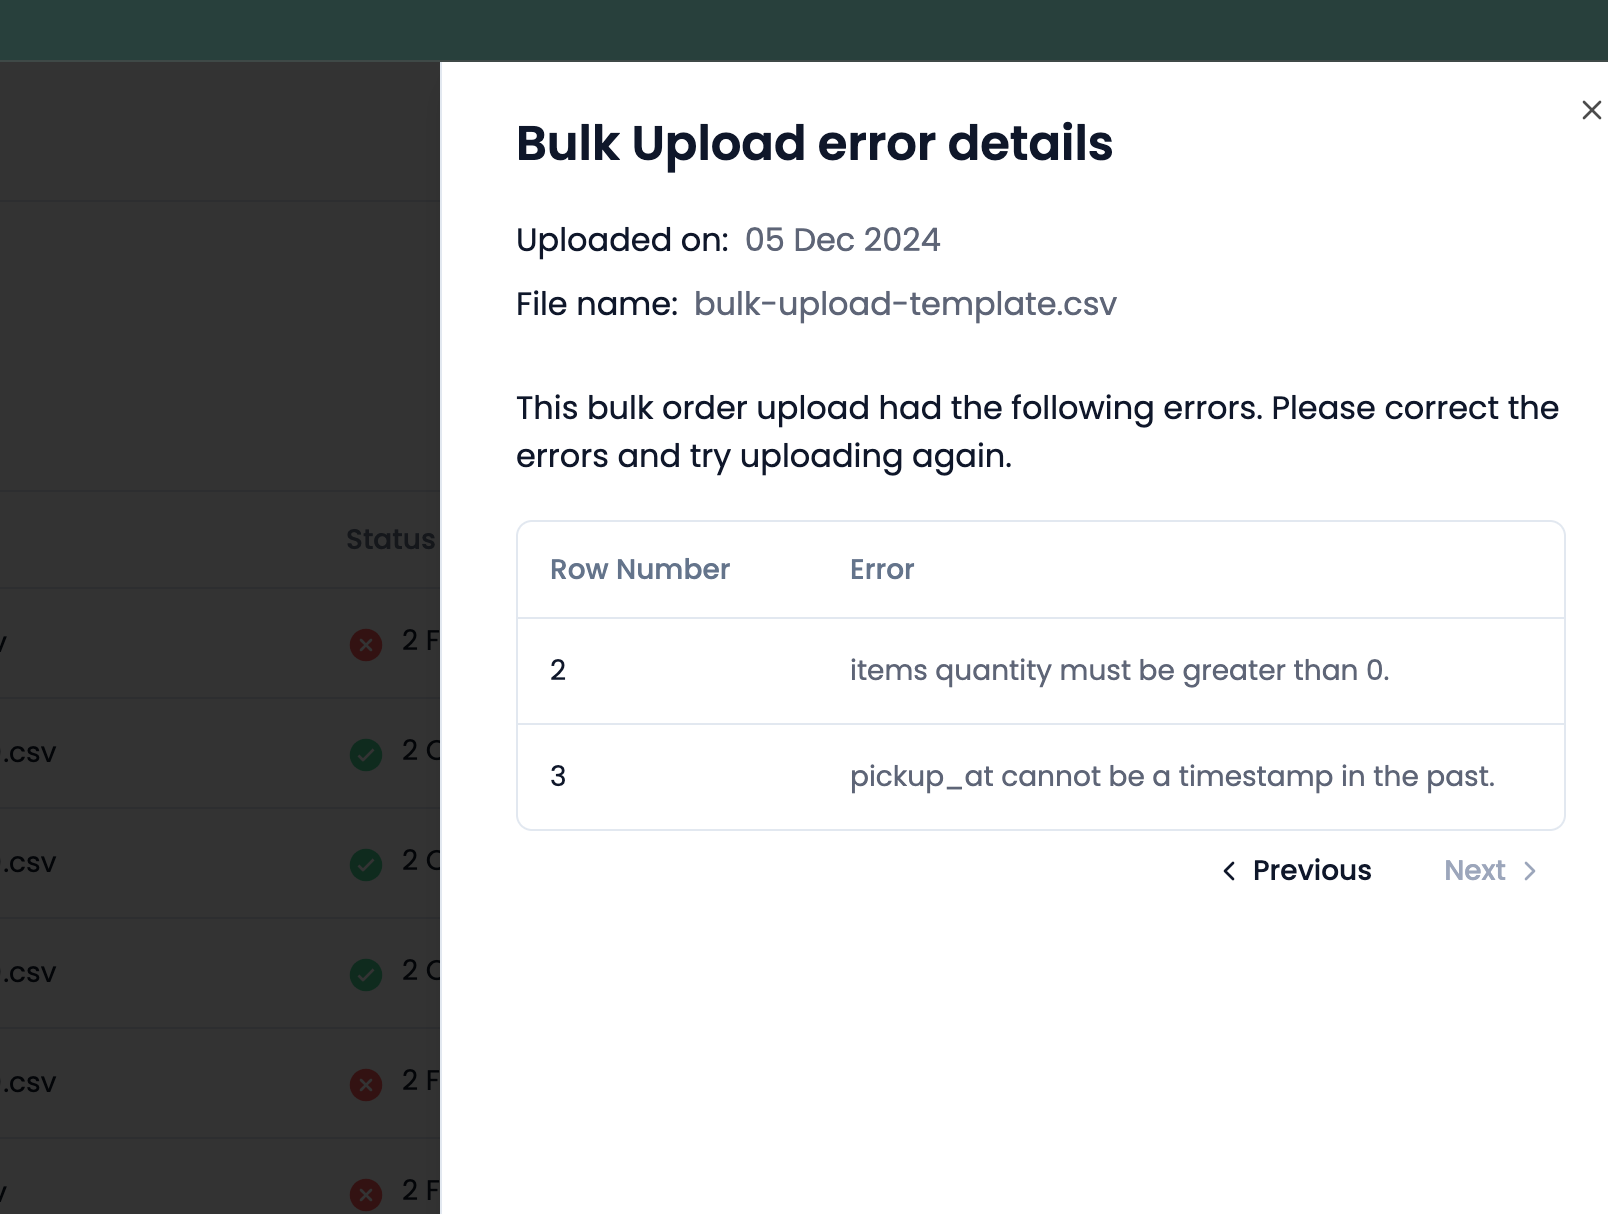
Incase of there are orders that have failed to upload, merchants can click on the View error details to see the exact row that failed to upload along with the reason of failure.
Updated 4 days ago